Headstand

Stage 1 (For Beginners):
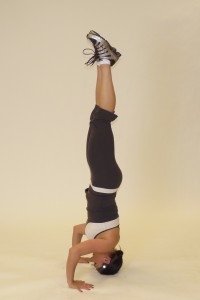
1.    Put your yoga mat into a comer, kneel down in front of it and place your interlocked fingers in the comer close to the walls.
2.    Put your head into the hollow of the palms, rise off the knees and take a step or two towards the comer.
3.    Lift one leg and place it in the comer against the wall. If you are a little unsure, ask a friend to hold the leg and put it in the corner. Now, just kick the other leg up. Stay there for about 15 seconds, trying to remain relaxed.
4.    To come out of the headstand, just lower one leg at a time. Again, if you feel unsure, ask a friend to hold one of your legs while you lower the other.

Stage 2 (Standard Headstand)
1.    Kneel down on your yoga mat. Interlock the fingers of your hands and place them and your forearms on the extra padding on the yoga mat. Keep the elbows fairly close together.
2.    Place the back of your head into the hollow of the palms (not on the palms or fingers). Rise up off your knees and take a step or two towards your head.
3.    Inhale, and slowly raise the legs until they are vertical. Keep your back straight and try to relax. Breathe slowly and deeply from the abdomen.
4.    Concentrate on the brain or the pineal gland between the eyebrows.
5.    To come down, bend your knees and lower one leg and then the other

Model: Frannie Danzinger

by

Warrior 2

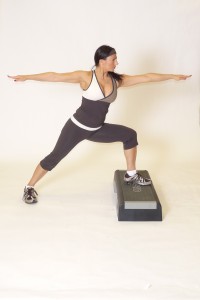
Raise your arms parallel to the floor and reach them actively out to the sides, shoulder blades wide, palms down.  Turn your right foot in slightly to the right and your left foot out to the left 90 degrees. Align the left heel with the right heel. Firm your thighs and turn your left thigh outward so that the center of the left kneecap is in line with the center of the left ankle.  Exhale and bend your left knee over the left ankle, so that the shin is perpendicular to the floor. If possible, bring the left thigh parallel to the floor.  Stretch the arms away from the space between the shoulder blades, parallel to the floor.  Don’t lean the torso over the left thigh: Keep the sides of the torso equally long and the shoulders directly over the pelvis. Press the tailbone slightly toward the pubis. Turn the head to the left and look out over the fingers.   Stay for 30 seconds to 1 minute. Inhale to come up. Reverse the feet and repeat for the same length of time to the left.

Model: Frannie Danzinger

by

Forward Facing Lunge

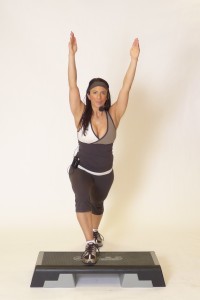
Step forward, stabilizing your body on the stance (supporting) leg. Avoid any sideways tilting or swaying in your upper body and try not to move the stance (supporting) foot.  As you lunge forward, focus more on dropping your hips towards the floor rather than driving your hips forward. This will help control the amount of forward movement of your shinbone over your foot. Continue lowering your body to a comfortable position or until your front thigh becomes parallel with the floor and your tibia (shinbone) is in a slight forward lean. While lunging, simultaneously, bend forward at your hips, maintaining a flat back.   Be sure that your front knee is aligned on top of your ankle, and your back knee is drawn to the floor and a right angle.

Model: Frannie Danzinger

by

Downward-Facing Dog

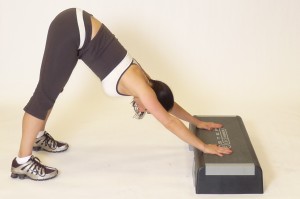
To start, come onto the floor on your hands and knees.  Set your knees directly below your hips ad your hands slightly forward of your shoulders.  Spread your palms, index fingers parallel or slightly turned out, and turn your toes under.  Exhale and lift your knees away from the floor.  Lengthen your tailbone away from the back of your pelvis.  Against this resistance, lift the sitting bones toward the ceiling, and from your inner ankles draw the inner legs in.  Exhale and push your thighs back and stretch your heels onto or down toward the floor.  Straighten, but do not lock your knees.

Model: Frannie Danzinger

by